This step-by-step guide is for MRI students, radiographers, and technologists who wish to improve their planning skills and master the anal fistula MRI protocol.
What you will learn:
Key factors in anal fistula MRIs, including trade-offs.
Patient and scanner setup tips.
Best pulse sequences and planning techniques.
Ways to avoid common artifacts.
What great anal fistula images should look like.
Key Takeaways
Because anal fistula MRIs need to visualize tiny fluid-filled tracts, it’s recommended to prioritize resolution.
The anal canal has complex, small structures where fistulas can form branching patterns. We need high resolution to detect these subtle tracts while keeping scan time short to avoid motion artifacts.
We typically 1) prioritize resolution, 2) maintain short scan time, and 3) optimize SNR as needed.
An empty bladder and minimal bowel gas reduce the water, gas, and tissue interfaces that break spectral fat saturation. Evidence on preparation for anal MRI is limited and practice varies between institutions, but where preparation has been poor, spectral saturation is likely to fail and STIR is the safer choice.
We mainly use T2 TSE sequences with fat saturation in anal fistula MRIs.
T2 sequences make fluid appear bright, helping us see fistula tracts clearly against darker tissue. Fat saturation enhances this contrast by suppressing the bright fat signal.
This makes inflamed tissue and fluid collections stand out more.
Five artifacts account for most failed anal fistula studies.
Motion is the main one, and shortening scan time with parallel imaging or a radial acquisition is the main defense. Turbo spin echo rather than gradient echo limits susceptibility artifact at gas interfaces, foldover suppression limits wrap, higher bandwidth reduces chemical shift, and STIR rather than spectral saturation is the fallback when field inhomogeneity breaks fat suppression.
Intro to Anal Fistula MRIs
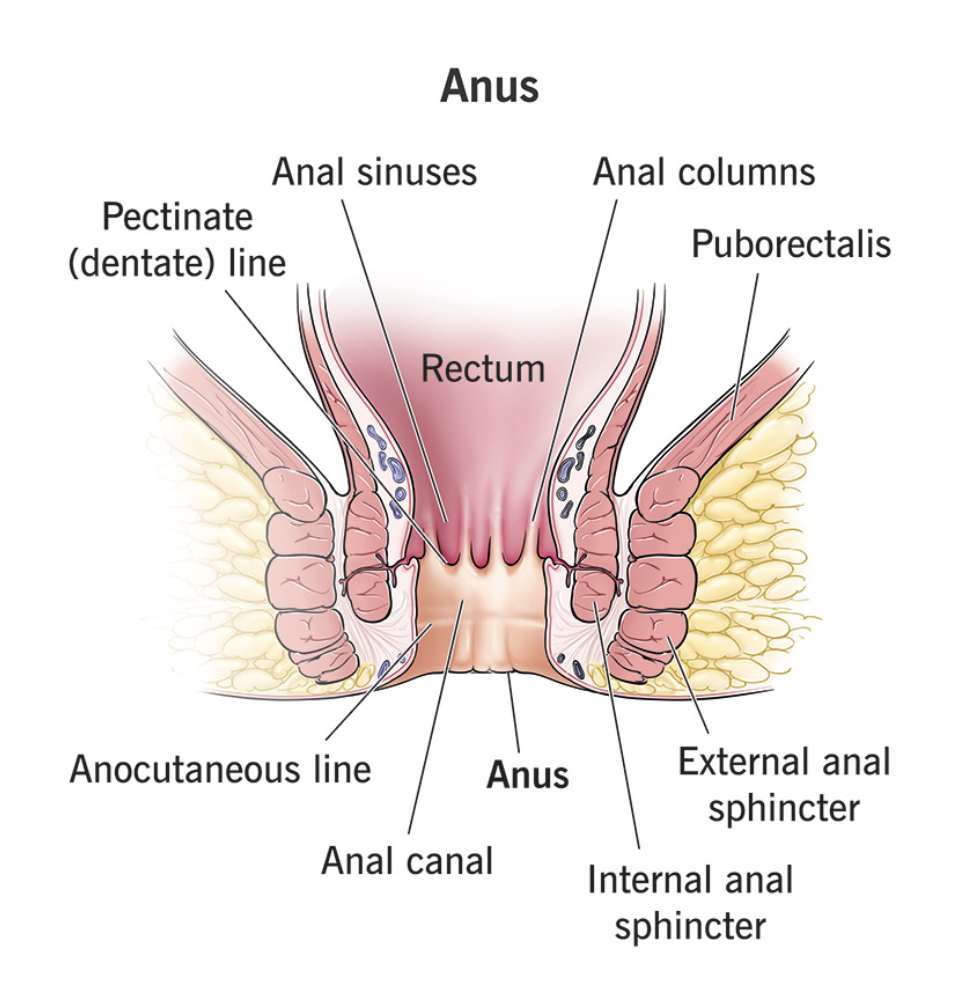
The anal canal and surrounding perianal region are complex anatomical areas where abnormal connections called fistulas can develop between the anal canal and the skin surface. Most of these tracts arise from cryptoglandular infection, where an infected anal gland drains through to the skin. The second major cause is Crohn’s disease, where perianal fistulas are common and often complex. Fistulas can also follow surgery, trauma, radiotherapy, or malignancy.
Anal fistula MRI is one of the most important pelvic imaging protocols for colorectal surgery planning. It provides detailed visualization of fistula tracts, their relationship to sphincter muscles, and any associated abscesses or inflammation. MRI is used both for surgical planning and for directing and monitoring treatment in perianal Crohn’s disease.
How to Balance the 3 Trade-offs in Anal Fistula MRIs
In MRI, we always face a trade-off between 3 key metrics:
Scan Time: How fast a pulse sequence can be completed.
Resolution: How much detail the image can display.
SNR: How clear the image is, meaning how much signal we have compared with noise.
Improving one of these metrics often reduces the performance of the others. To decide what trade-offs to make, we must consider the needs of each clinical situation.
For anal fistula MRIs, we face these challenges:
The tracts we are looking for are thin, fluid-filled, and can branch. The sphincter layers they cross are only a few millimeters thick, so without high in-plane resolution a small intersphincteric tract or a short side branch can be missed.
The perianal region sits next to gas-filled bowel and, if the patient has not emptied their bladder, a large fluid collection. Those interfaces distort the local magnetic field, which is what makes spectral fat saturation unreliable here and pushes us toward inversion recovery.
Bowel motion and patient movement blur exactly the fine detail the study depends on, and the fat-suppressed T2 sequences we rely on are long enough for that to matter.
Therefore, we typically:
Prioritize resolution so thin tracts and the sphincter layers they cross stay separable.
Keep scan time short enough that bowel and patient motion do not blur the detail we acquired the resolution for.
Maintain enough SNR to keep the fluid-to-fat contrast clear once fat suppression has removed the brightest signal in the image.
Note! Prioritizing resolution in anal fistula MRIs is only a general guideline, NOT a strict rule. If your patient has difficulty staying still or the bowel motion is excessive, you may need to prioritize scan time instead. The right balance always depends on factors such as field strength, patient cooperation, available hardware, and the clinical question.
Anal Fistula Health Conditions and the MRI Sequences That Reveal Them
The anal fistula MRI study helps us diagnose and characterize various perianal conditions. The table below lists the most common conditions and the pulse sequences that reveal them:
Common Anal Fistula Conditions
Clearly Seen on Sequence
Why This Sequence?
Fistula tracts and classification:
• Intersphincteric fistulas
• Transsphincteric fistulas
• Suprasphincteric fistulas
• Extrasphincteric fistulas
• Horseshoe extensions (a secondary tract configuration, not a Parks category)
T2 TSE
Makes fluid appear bright against darker tissue, clearly showing tubular fistula tracts. Simple fistulas are single tracts with no branching, abscess, or Crohn’s involvement, typically intersphincteric or low transsphincteric (under 30% of the external sphincter). Complex fistulas cross more of the sphincter, run a suprasphincteric or extrasphincteric course, branch, or involve Crohn’s disease.
Suppresses fat to highlight fluid collections and inflamed tissue. The increased contrast-to-noise ratio between normal fat and abnormal fluid makes even small abscesses visible. Important for identifying hidden pockets of infection.
Nulls fat signal completely while highlighting all water content in tissues. Shows the full extent of edema and inflammatory spread. Detects inflammation based on increased water content, whether acute or chronic. Most sensitive for mapping inflammatory extent.
Highlights fat and provides clear anatomical contrast. Shows structural details and chronic changes. Provides baseline anatomy before contrast administration.
Fistula activity and enhancement:
• Abscess walls (rim enhancement)
• Active granulation tissue
• Tumor involvement
• Active versus fibrotic tract walls
T1 TSE (Post-contrast)
Shows tissues with active blood supply through enhancement. Granulation tissue enhances, fibrosis does not. Abscess walls show rim enhancement. Important for telling healing tissue apart from scar.
How to Perform an Anal Fistula MRI Protocol
The step-by-step guide below will show you how to set up and perform an anal fistula MRI protocol in practice.
We will perform the protocol in 3 parts:
Set up the Patient and MRI Scanner
Plan and Acquire the Protocol Sequences
Review the Images
Part 1: Set up the Patient and MRI Scanner
1. Prepare the Patient
Before scanning, proper patient preparation has a direct effect on image quality.
The patient should empty their bladder before the exam. A full bladder can deform rectal anatomy and create interfaces between fluid and gas that impair fat suppression.
Where scheduling allows, ask the patient to avoid gas-producing foods such as beans, pulses, and high-fermentable-fiber foods the day before the scan.
Some protocols may require a small rectal enema to clear feces from the rectum, but this is institution-specific.
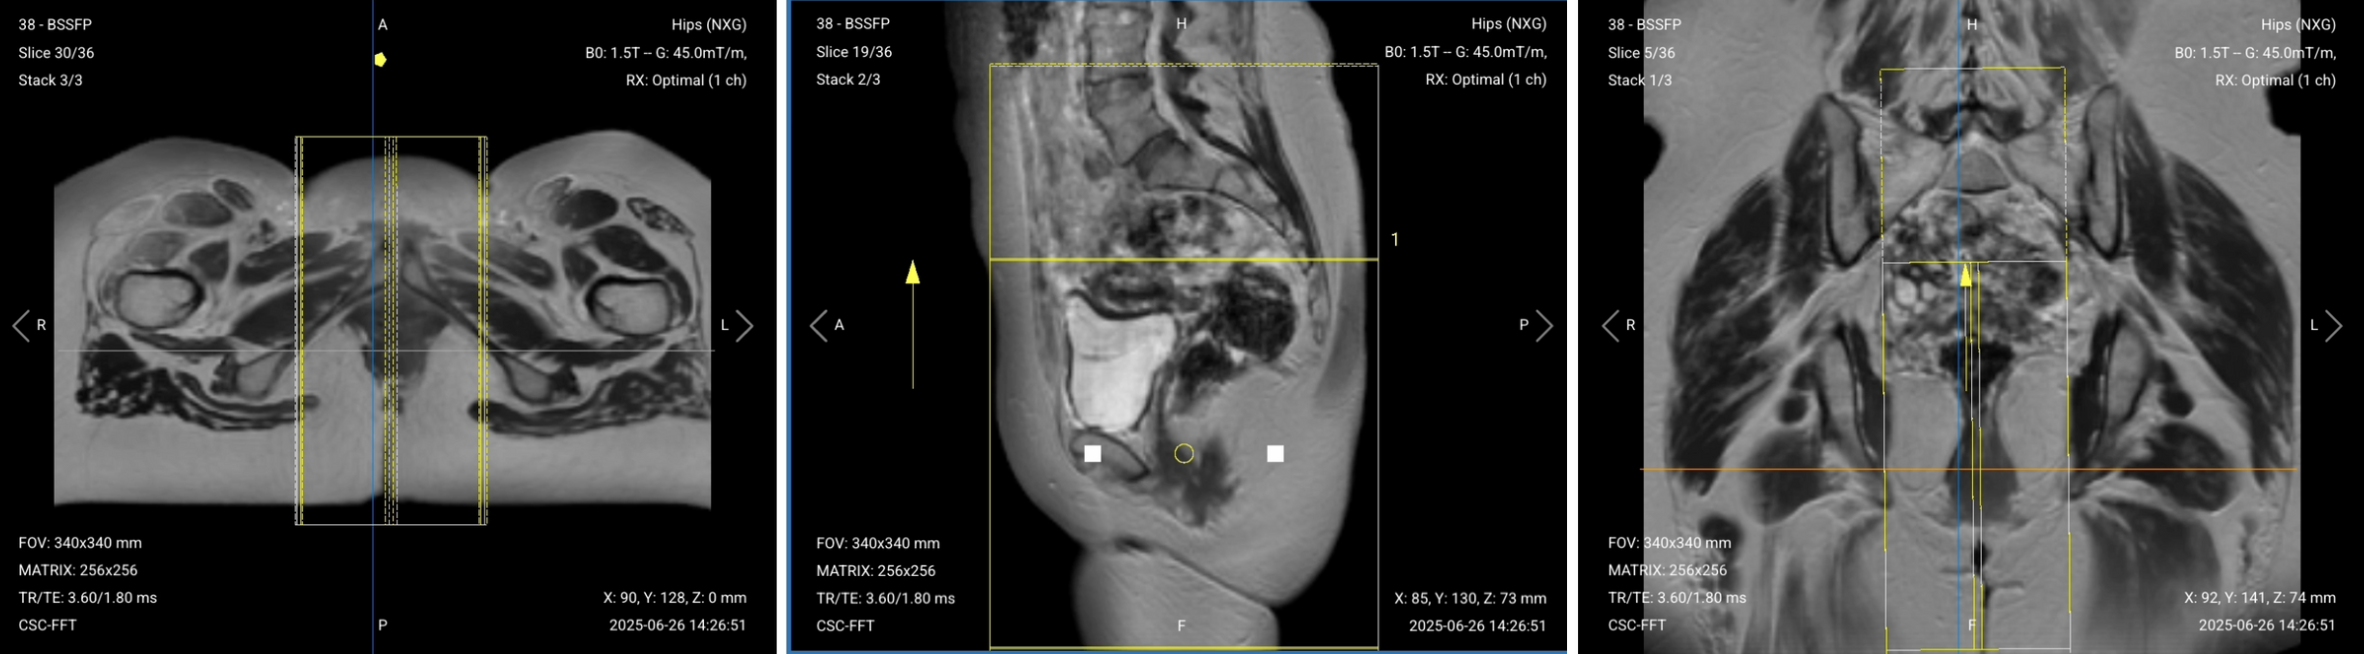
The localizer images below show what happens when this preparation is skipped.
2. Position the Patient in the Scanner
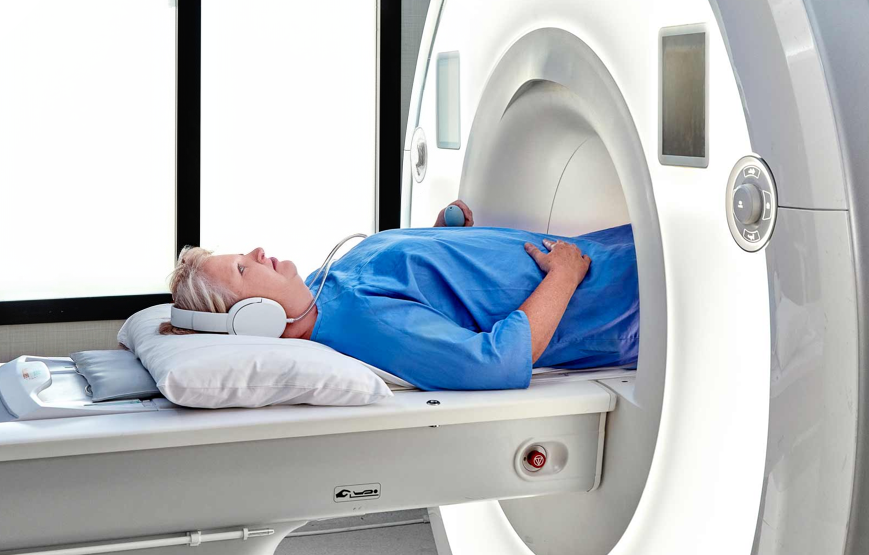
Lay the patient feet-first and supine (on their back) with the pelvis centered at the scanner’s isocenter.
Using a feet-first position makes the scan feel less claustrophobic for the patient, which reduces the risk of motion artifacts.
Use a pelvic phased-array coil, or an external body phased-array surface coil where no dedicated pelvic coil is available. Do not use the scanner’s integrated body coil for reception. Its low sensitivity costs the SNR this high-resolution protocol depends on. Position the coil’s upper border at the iliac crest. This coil provides strong signal reception and full coverage of the perianal region.
✅ Correct Patient Positioning:
3. Check the Scanner’s Hardware Settings
Once the patient is in place, review your scanner’s hardware settings.
In this guide, we will use the following settings:
Scanner Setting
Value
Why This Value
Magnetic field strength
1.5 T
The most common clinical field strength, giving enough SNR for this protocol with less susceptibility and B1 artifact than 3 T. The gas and fluid interfaces in the pelvis make that artifact advantage substantive here.
Maximum gradient strength
45 mT/m
Provides strong, versatile gradient performance that supports fast imaging and precise spatial encoding.
This hardware setup is widely used in clinical practice. It balances acquisition time, image quality, and patient comfort.
Long turbo spin echo trains deposit considerable energy, so this protocol can reach SAR or B1 RMS limits, particularly at 3 T. If the scanner flags a limit, reduce the refocusing flip angle, lower the turbo factor, or lengthen TR before sacrificing resolution.
4. Capture the Initial Localizer Images
Before we can perform any MRI protocol, we must always capture initial localizer images of the patient. These images act as a guide for planning the detailed scans we will perform next.
We should always capture localizers in three planes:
Axial
Sagittal
Coronal
Once acquired, load the initial localizer images into the three viewports.
Then, scroll through each of the image stacks to locate a central slice that clearly shows the anatomy of the anal canal.
Localizer Images Loaded in Three Viewports:
This simulated patient is deliberately not well prepared. The dark pockets are bowel gas, the rectum contains feces, and the bright structure anteriorly is a full bladder. This is what poor preparation looks like on the localizers, and it is why spectral fat saturation fails later in this protocol.
Part 2: Plan and Acquire the Protocol Sequences
When all preparations are ready, we can start planning and acquiring the protocol sequences.
Let’s go through the pulse sequences a standard anal fistula MRI protocol includes, why we perform them, and how to set them up.
An Example Six-Sequence Anal Fistula MRI Protocol
Large-FOV Coronal or Axial T2 TSE (fat-suppressed), FOV 280–320 mm, for supralevator and presacral coverage, not detail
Sagittal T2 TSE High Resolution
Sagittal T2 TSE Fat-Saturated (SPAIR or STIR)
Axial T2 TSE Fat-Saturated (SPAIR or STIR)
Coronal T2 TSE Fat-Saturated (SPAIR or STIR)
Sagittal T1 TSE (Pre-contrast)
Sagittal T1 TSE (Post-contrast)
The large-FOV sequence deliberately uses lower resolution than the other six, with 4–5 mm slice thickness and a 256 matrix. Its job is to catch supralevator, presacral, and other remote extensions that the small-FOV high-resolution series will crop out.
Many departments run these sequences at 3 to 3.5 mm and add slices to hold the same coverage.
We mainly use T2 Turbo Spin Echo sequences with fat saturation for this study. These sequences make fluid appear bright, which helps us detect fistula tracts, abscesses, and inflammation clearly against darker tissue.
Fat saturation techniques enhance this contrast further by suppressing the bright fat signal. This increases the contrast-to-noise ratio between pathology and normal tissue.
In the sections below, we go through how to plan and set up each sequence.
Note: The values in the tables below are worked examples for the 1.5 T setup used in this guide. Exact numbers vary by scanner, coil and department, so treat them as a starting point rather than as fixed limits.
1. Sagittal T2 TSE High Resolution
✅ Correct Planning:
Planning Instructions:
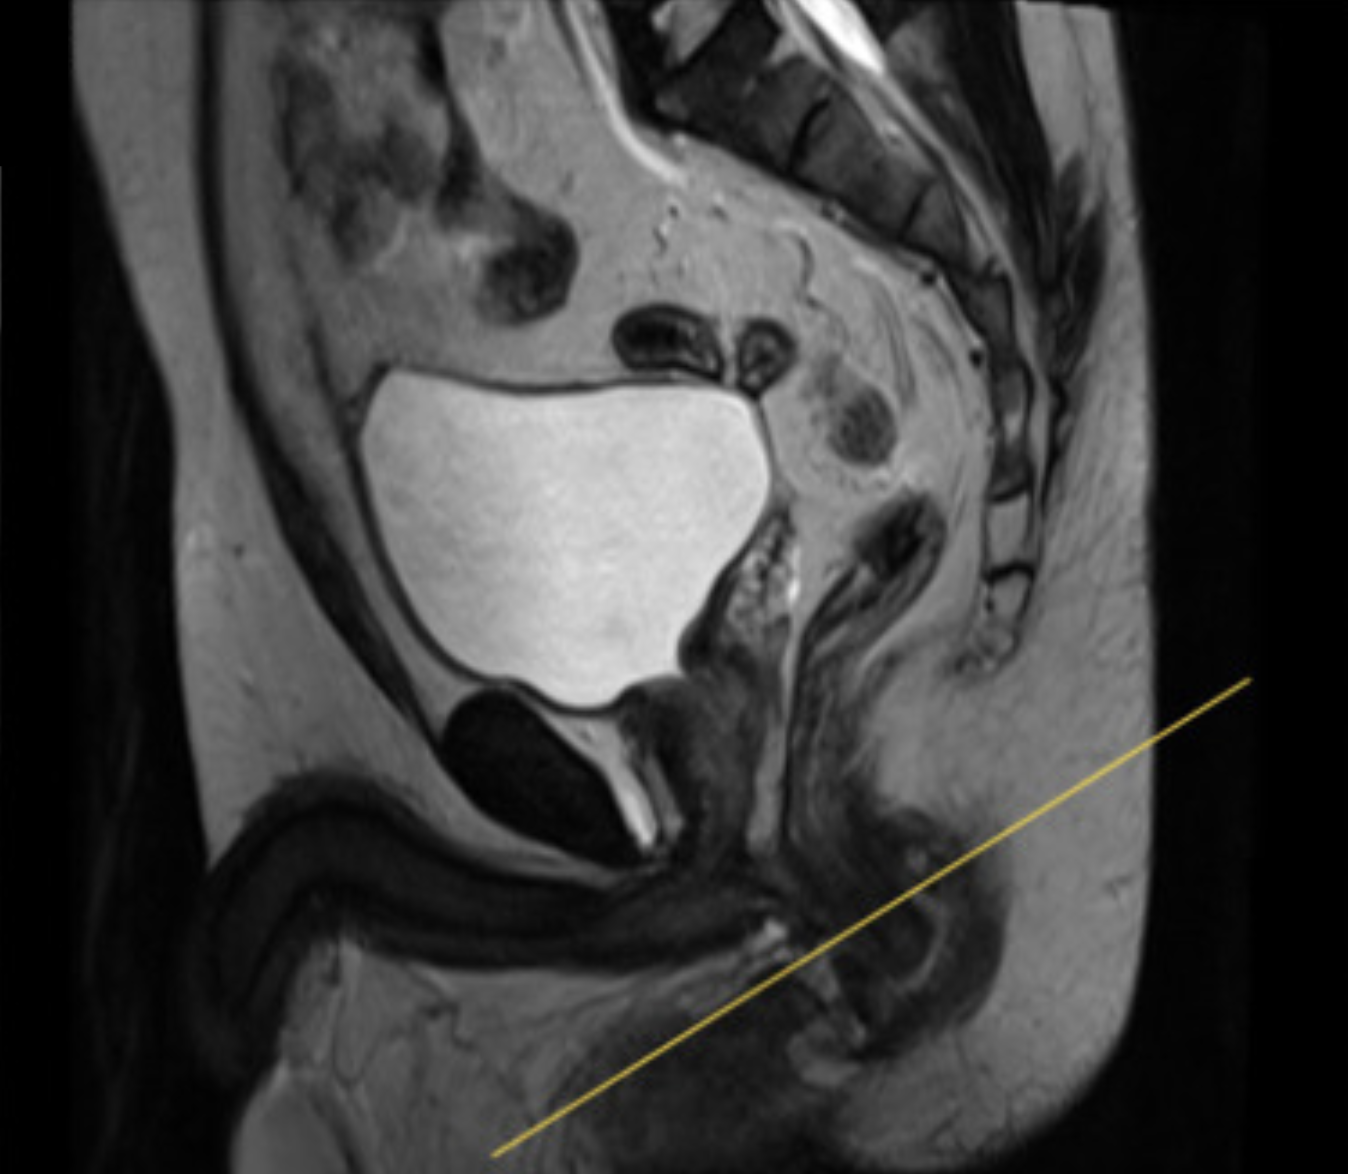
Use the anal canal and rectum as your anatomical references.
Align the slices as follows:
Axial localizer: position the central slice in the midline, using the pubic symphysis as your reference, then check that it passes through the anal canal.
Coronal localizer: Angle slices to be exactly in the middle of the rectum, following its axis.
Use appropriate geometry parameters:
Slice number: 18–22 to fully cover the perianal region.
Slice thickness: 4 mm for high resolution without sacrificing SNR.
Slice gap: 0.8 mm (20% of thickness) to prevent crosstalk while maintaining continuity.
Set the foldover direction (phase encoding) to foot to head (FH) to reduce wrap and respiratory motion artifacts.
Where available, run this sequence with a radial k-space trajectory (BLADE, PROPELLER, or MultiVane depending on vendor). Radial sampling is markedly less sensitive to motion. Scan time and resolution behaviour vary by vendor implementation, so check what your scanner does before assuming it is free.
Set the field of view to extend inferiorly past the buttock and superiorly to include the upper rectum. Set the slice stack wide enough to span the full width of the perianal region.
Parameters for Sagittal T2 TSE High Resolution:
Parameter
Recommended Values
Why These Values
Echo Time (TE)
100–120 ms
Long TE is required for T2 contrast.
Repetition Time (TR)
2,500–3,500 ms
Long TR is required for T2 contrast.
Field of View (FOV)
200 × 200 mm
Small enough to focus on the perianal region with high detail.
Matrix
320 × 256
High read matrix resolves small tracts, with phase encoding reduced to hold scan time.
Foldover Direction (Phase)
Foot-to-Head (FH)
Puts phase encoding along the long axis of the pelvis, which avoids wrap from the abdominal wall and buttock.
Number of Slices
18–22
Enough to cover the entire perianal region and lower rectum.
Slice Thickness
4 mm
Thin enough to resolve the sphincter layers and small tracts, without dropping the SNR this in-plane resolution needs.
Slice Gap
0.8 mm
20% of slice thickness, which limits cross-talk without hiding anatomy.
NEX / Averages
2
Two averages give the SNR this voxel size needs, at the cost of doubling acquisition time.
Turbo Factor / ETL
24–30
Higher turbo factor reduces scan time, and long effective TE provides T2 weighting.
Bandwidth per pixel
230–260 Hz/px
High enough to limit chemical shift at the fat and fluid interfaces, while keeping the SNR this sequence needs.
Fat Suppression
None
Native fat signal kept, so fat planes stay visible for comparison against the suppressed series.
Partial Fourier
No
Full phase encoding, since there is no fat-suppression pulse to pay for and the SNR is worth more here.
Foldover Suppression
Yes
Oversamples foot to head, which keeps signal from above and below the field of view out of the image.
K-space Trajectory
Radial where available, otherwise Cartesian
Reduces motion sensitivity at high resolution.
Choosing Fat Suppression for Anal Fistula MRI: SPAIR vs STIR
The following T2 sequences will use fat suppression.
When imaging anal fistulas, however, it’s very important to select the right fat suppression technique for image quality.
There are two main fat suppression options:
SPAIR (Spectral Fat Saturation): SPAIR uses a specific pulse to suppress fat based on its frequency. It’s faster than STIR and provides more robust suppression when the magnetic field is uniform. However, SPAIR is very sensitive to field inhomogeneity. In the pelvis, interfaces between water (bladder), gas (bowel), and tissue create field variations that can cause SPAIR to fail.
STIR (Inversion Recovery): STIR works by setting an inversion time that nulls fat signal completely. It’s less sensitive to field inhomogeneity, making it more reliable when bowel gas or poor patient preparation creates field distortions.
Which to Choose for Anal Fistula MRI:
First choice: SPAIR when the patient is well-prepared (empty bladder, minimal bowel gas)
Inversion times for fat suppression at 1.5 T sit in the region of 130 to 170 ms, and this guide uses 140 ms. While STIR takes longer than SPAIR, its robust suppression often makes it worth the extra time in pelvic imaging.
2. Sagittal T2 TSE Fat-Saturated (SPAIR or STIR)
✅ Correct Planning:
Planning Instructions:
Copy the slice geometry and planning from the previous Sagittal T2 TSE sequence.
Keep the same slice angulation, coverage, and positioning to ensure images of different contrasts can be clearly compared.
Parameters for Sagittal T2 TSE Fat-Saturated:
Parameter
Recommended Values
Why These Values
Echo Time (TE)
100–120 ms
Long TE is required for T2 contrast.
Repetition Time (TR)
2,500–3,500 ms
Long TR is required for T2 contrast.
Inversion Time (TI)
130–170 ms
Nulls perianal fat at 1.5 T so fluid in the tracts stands out.
Field of View (FOV)
200 × 200 mm
Small enough to focus on the perianal region with high detail.
Matrix
320 × 256
High read matrix resolves small tracts, with phase encoding reduced to hold scan time.
Foldover Direction (Phase)
Foot-to-Head (FH)
Puts phase encoding along the long axis of the pelvis, which avoids wrap from the abdominal wall and buttock.
Number of Slices
18–22
Enough to cover the entire perianal region and lower rectum.
Slice Thickness
4 mm
Thin enough to resolve the sphincter layers and small tracts, without dropping the SNR this in-plane resolution needs.
Slice Gap
0.8 mm
20% of slice thickness, which limits cross-talk without hiding anatomy.
NEX / Averages
2
Two averages give the SNR this voxel size needs, at the cost of doubling acquisition time.
Turbo Factor / ETL
24–30
Higher turbo factor reduces scan time, and long effective TE provides T2 weighting.
Bandwidth per pixel
230–260 Hz/px
High enough to limit chemical shift at the fat and fluid interfaces, while keeping the SNR this sequence needs.
Fat Suppression
STIR or SPAIR
SPAIR faster and sufficient when the patient is well-prepared; STIR more reliable if bowel gas or a full bladder causes field inhomogeneity.
Partial Fourier
Phase-conjugate (half-Fourier), factor 0.6
Half-Fourier recovers the time the fat-suppression pulse costs, at some cost to SNR and some phase-direction blurring.
Foldover Suppression
Yes
Oversamples foot to head, which keeps signal from above and below the field of view out of the image.
3. Axial T2 TSE Fat-Saturated (SPAIR or STIR)
Some protocols also acquire a non-fat-saturated axial T2 in this plane, since it gives the clearest view of the internal opening and the sphincter layers before fat suppression is applied. This guide covers the fat-saturated version; if your department runs both, use the same geometry with fat suppression turned off for the second acquisition.
✅ Correct Planning:
Planning Instructions:
Use the anal canal and internal anal sphincter as your anatomical references.
Align the slices as follows:
Sagittal localizer: Position slices perpendicular to the anal canal axis.
Coronal localizer: check the stack has no left-right tilt and that coverage reaches both ischiorectal fossae.
Use appropriate geometry parameters:
Slice number: 18–22 to cover from above the levator ani to the perineal skin.
Slice thickness: 4 mm for good resolution while maintaining SNR.
Slice gap: 0.8 mm (20% of thickness) to avoid missing pathology.
Set the foldover direction (phase encoding) to right to left (RL) to reduce motion artifacts from bowel.
Parameters for Axial T2 TSE Fat-Saturated:
Parameter
Recommended Values
Why These Values
Echo Time (TE)
100–120 ms
Long TE is required for T2 contrast.
Repetition Time (TR)
2,500–3,500 ms
Long TR is required for T2 contrast.
Inversion Time (TI)
130–170 ms
Nulls perianal fat at 1.5 T so fluid in the tracts stands out.
Field of View (FOV)
200 × 200 mm
Wide enough to include both ischiorectal fossae, which is where secondary tracts collect.
Matrix
320 × 256
Matches the other sequences so the same in-plane detail carries across all planes.
Foldover Direction (Phase)
Right-to-Left (RL)
Puts phase encoding across the pelvis, which keeps ghosting off the anal canal and allows a compact field of view.
Number of Slices
18–22
Covers from levator ani to perineal skin.
Slice Thickness
4 mm
Thin enough to resolve the sphincter layers and small tracts, without dropping the SNR this in-plane resolution needs.
Slice Gap
0.8 mm
20% of slice thickness, which limits cross-talk without hiding anatomy.
NEX / Averages
2
Two averages give the SNR this voxel size needs, at the cost of doubling acquisition time.
Turbo Factor / ETL
24–30
Higher turbo factor reduces scan time, and long effective TE provides T2 weighting.
Bandwidth per pixel
230–260 Hz/px
High enough to limit chemical shift at the fat and fluid interfaces, while keeping the SNR this sequence needs.
Fat Suppression
STIR or SPAIR
SPAIR faster and sufficient when the patient is well-prepared; STIR more reliable if bowel gas or a full bladder causes field inhomogeneity.
Partial Fourier
Phase-conjugate (half-Fourier), factor 0.6
Half-Fourier recovers the time the fat-suppression pulse costs, at some cost to SNR and some phase-direction blurring.
Foldover Suppression
Yes
Oversamples right to left, which keeps the hips and lateral soft tissue from folding into the image.
4. Coronal T2 TSE Fat-Saturated (SPAIR or STIR)
✅ Correct Planning:
Planning Instructions:
Use the anal canal as your anatomical reference.
Align the slices as follows:
Sagittal localizer: Position slices parallel to the anal canal axis.
Axial localizer: Ensure coverage of the ischiorectal fossae bilaterally.
Use appropriate geometry parameters:
Slice number: 15–19 to cover from rectum posteriorly to pubic symphysis anteriorly.
Slice thickness: 4 mm for adequate resolution.
Slice gap: 0.8 mm (20% of thickness) to maintain continuity.
Set the foldover direction (phase encoding) to right to left (RL) to minimize motion artifacts.
Ensure coverage includes horseshoe tracts and bilateral ischiorectal fossae.
Parameters for Coronal T2 TSE Fat-Saturated:
Parameter
Recommended Values
Why These Values
Echo Time (TE)
100–120 ms
Long TE is required for T2 contrast.
Repetition Time (TR)
2,500–3,500 ms
Long TR is required for T2 contrast.
Inversion Time (TI)
130–170 ms
Nulls perianal fat at 1.5 T so fluid in the tracts stands out.
Field of View (FOV)
200 × 200 mm
Wide enough to include bilateral ischiorectal fossae.
Matrix
320 × 256
Matches the other sequences so the same in-plane detail carries across all planes.
Foldover Direction (Phase)
Right-to-Left (RL)
Puts phase encoding across the pelvis, which keeps ghosting away from the ischiorectal fossae.
Number of Slices
15–19
Seventeen 4 mm slices give roughly 81 mm of coverage, from the posterior rectum to the pubic symphysis.
Slice Thickness
4 mm
Thin enough to resolve the sphincter layers and small tracts, without dropping the SNR this in-plane resolution needs.
Slice Gap
0.8 mm
20% of slice thickness, which limits cross-talk without hiding anatomy.
NEX / Averages
2
Two averages give the SNR this voxel size needs, at the cost of doubling acquisition time.
Turbo Factor / ETL
24–30
Higher turbo factor reduces scan time, and long effective TE provides T2 weighting.
Bandwidth per pixel
230–260 Hz/px
High enough to limit chemical shift at the fat and fluid interfaces, while keeping the SNR this sequence needs.
Fat Suppression
STIR or SPAIR
SPAIR faster and sufficient when the patient is well-prepared; STIR more reliable if bowel gas or a full bladder causes field inhomogeneity.
Partial Fourier
Phase-conjugate (half-Fourier), factor 0.6
Half-Fourier recovers the time the fat-suppression pulse costs, at some cost to SNR and some phase-direction blurring.
Foldover Suppression
Yes
Oversamples right to left, which keeps the hips and lateral soft tissue from folding into the image.
5. Sagittal T1 TSE (Pre-contrast)
✅ Correct Planning:
Planning Instructions:
Copy the slice geometry and planning from Sequence 1, Sagittal T2 TSE High Resolution.
Keep the same slice angulation, coverage, and positioning to ensure images of different contrasts can be clearly compared.
Parameters for Sagittal T1 TSE (Pre-contrast):
Parameter
Recommended Values
Why These Values
Echo Time (TE)
25–35 ms
Shortest TE this echo train allows, which keeps T1 contrast dominant.
Repetition Time (TR)
400–600 ms
Short TR is required for T1 contrast.
Field of View (FOV)
200 × 200 mm
Matches T2 sequences for comparison.
Matrix
320 × 256
Matches the other sequences so the same in-plane detail carries across all planes.
Foldover Direction (Phase)
Foot-to-Head (FH)
Puts phase encoding along the long axis of the pelvis, which avoids wrap from the abdominal wall and buttock.
Number of Slices
18–22
Matches coverage of T2 sequences.
Slice Thickness
4 mm
Thin enough to resolve the sphincter layers and small tracts, without dropping the SNR this in-plane resolution needs.
Slice Gap
0.8 mm
20% of slice thickness, which limits cross-talk without hiding anatomy.
NEX / Averages
2
Two averages give the SNR this voxel size needs, at the cost of doubling acquisition time.
Turbo Factor / ETL
5–8
Kept short so the effective TE stays short, preserving T1-weighting.
Bandwidth per pixel
230–260 Hz/px
High enough to limit chemical shift at the fat and fluid interfaces, while keeping the SNR this sequence needs.
Fat Suppression
None
Native fat signal kept, so fat planes stay visible for comparison against the suppressed series.
Partial Fourier
No
Full phase encoding, since there is no fat-suppression pulse to pay for and the SNR is worth more here.
Foldover Suppression
Yes
Oversamples foot to head, which keeps signal from above and below the field of view out of the image.
Parallel Imaging
Not used here; GRAPPA, acceleration factor 2 where a multi-channel coil is available
Halves the phase-encoding steps to keep scan time down, at a modest SNR cost.
6. Sagittal T1 TSE (Post-contrast)
After administering gadolinium contrast (typically 0.1 mmol/kg body weight), wait approximately 30–60 seconds before acquiring post-contrast images.
Use spectral fat suppression after contrast, never STIR. STIR nulls tissue by T1, and gadolinium shortens the T1 of enhancing tissue, so a post-contrast STIR can suppress the enhancement the sequence is meant to show along with the fat.
This guide demonstrates the T1 series in sagittal, matching the video. Many departments also acquire fat-suppressed post-contrast T1 in oblique axial and coronal, aligned to the anal canal, since that is where a tract crossing the sphincters is best seen.
✅ Correct Planning:
Planning Instructions:
Copy the slice geometry and planning from the previous pre-contrast T1 TSE sequence.
Keep the same slice angulation, coverage, and positioning to ensure precise comparison between pre- and post-contrast images.
Apply spectral fat suppression. Do not run post-contrast T1 without it.
Parameters for Sagittal T1 TSE Post-contrast:
Parameter
Recommended Values
Why These Values
Echo Time (TE)
25–35 ms
Shortest TE this echo train allows, which keeps T1 contrast dominant.
Repetition Time (TR)
400–600 ms
Short TR is required for T1 contrast.
Field of View (FOV)
200 × 200 mm
Matches pre-contrast for direct comparison.
Matrix
320 × 256
Matches the other sequences, so the same in-plane detail carries across all planes.
Foldover Direction (Phase)
Foot-to-Head (FH)
Puts phase encoding along the long axis of the pelvis, which avoids wrap from the abdominal wall and buttock.
Number of Slices
18–22
Matches pre-contrast coverage exactly.
Slice Thickness
4 mm
Thin enough to resolve the sphincter layers and small tracts, without dropping the SNR this in-plane resolution needs.
Slice Gap
0.8 mm
20% of slice thickness, which limits cross-talk without hiding anatomy.
NEX / Averages
2
Two averages give the SNR this voxel size needs, at the cost of doubling acquisition time.
Turbo Factor / ETL
5–8
Kept short so the effective TE stays short, preserving T1-weighting.
Bandwidth per pixel
230–260 Hz/px
High enough to limit chemical shift at the fat and fluid interfaces, while keeping the SNR this sequence needs.
Fat Suppression
Spectral (SPAIR or Dixon), required
Without fat suppression, the enhancing tract wall and abscess rim compete with bright perianal fat, which is the same appearance the sequence exists to separate.
Partial Fourier
No
Full phase encoding, since there is no fat-suppression pulse to pay for and the SNR is worth more here.
Foldover Suppression
Yes
Oversamples foot to head, which keeps signal from above and below the field of view out of the image.
Parallel Imaging
Not used here; GRAPPA, acceleration factor 2 where a multi-channel coil is available
Halves the phase-encoding steps to keep scan time down, at a modest SNR cost.
How to Avoid Artifacts When Planning the Sequences
The table below lists the 5 common anal fistula artifacts, and what techniques you can use to avoid them:
Artifacts
Solution – How to Avoid It
Motion artifacts
Shorten scan time using parallel imaging or radial k-space acquisition (BLADE/PROPELLER).
Susceptibility artifacts
Use turbo spin echo instead of gradient echo sequences to reduce sensitivity to gas interfaces.
Wrap-around artifacts
Activate foldover suppression to prevent anatomy outside the field of view from overlapping.
Chemical shift artifacts
Increase the bandwidth to reduce the spatial displacement between fat and water signals.
Fat suppression failure
Use STIR instead of spectral fat saturation when field inhomogeneity is present.
Part 3: Review the Images
Finally, we will review the images to ensure all the anatomical information we need is clear.
These key structures must be clearly visible in an anal fistula MRI:
Internal and external anal sphincters
Levator ani muscle
Ischiorectal fossae
Perianal skin and subcutaneous tissue
Rectum and anal canal
Any fistula tracts, abscesses, or inflammatory changes
Below, we will go through all the different image contrasts and explain their specific role in imaging anal fistulas.
T2 TSE – Highlights Fluid-Filled Tracts and Anatomy
T2-weighted imaging makes fluids appear bright. This contrast is ideal for tissues and abnormalities with high water content.
In anal fistula MRI, T2 sequences carry most of the diagnostic load for detecting fistula tracts, which appear as bright tubular structures against darker muscle and fat. They help us map the exact course of fistulas through the sphincter complex and identify branching patterns.
We acquire sagittal views to assess the relationship between fistulas and the rectum, and to understand anterior-posterior spread.
T2 Fat-Saturated – Mapping Inflammatory Extent Through Edema
T2 Fat-Saturated imaging suppresses fat while keeping fluid bright. This shows all areas with increased water content, making it the most sensitive sequence for detecting inflammatory spread.
In anal fistula MRI, fat-suppressed T2, whether SPAIR or STIR, reveals the full extent of inflammation by highlighting edema in tissues. Any area with increased water appears bright, whether from acute infection or chronic inflammation. This complete map of inflammatory spread helps surgeons plan their approach. The image examples below use STIR, since spectral saturation failed on this poorly prepared patient.
We acquire fat-saturated T2 in all three planes to fully understand the fistula’s path and extent:
Sagittal views show the vertical relationship to the rectum and sphincters.
Axial views best demonstrate tracts crossing from internal to external sphincter.
Coronal views reveal horseshoe extensions and bilateral spread that might be missed in other planes.
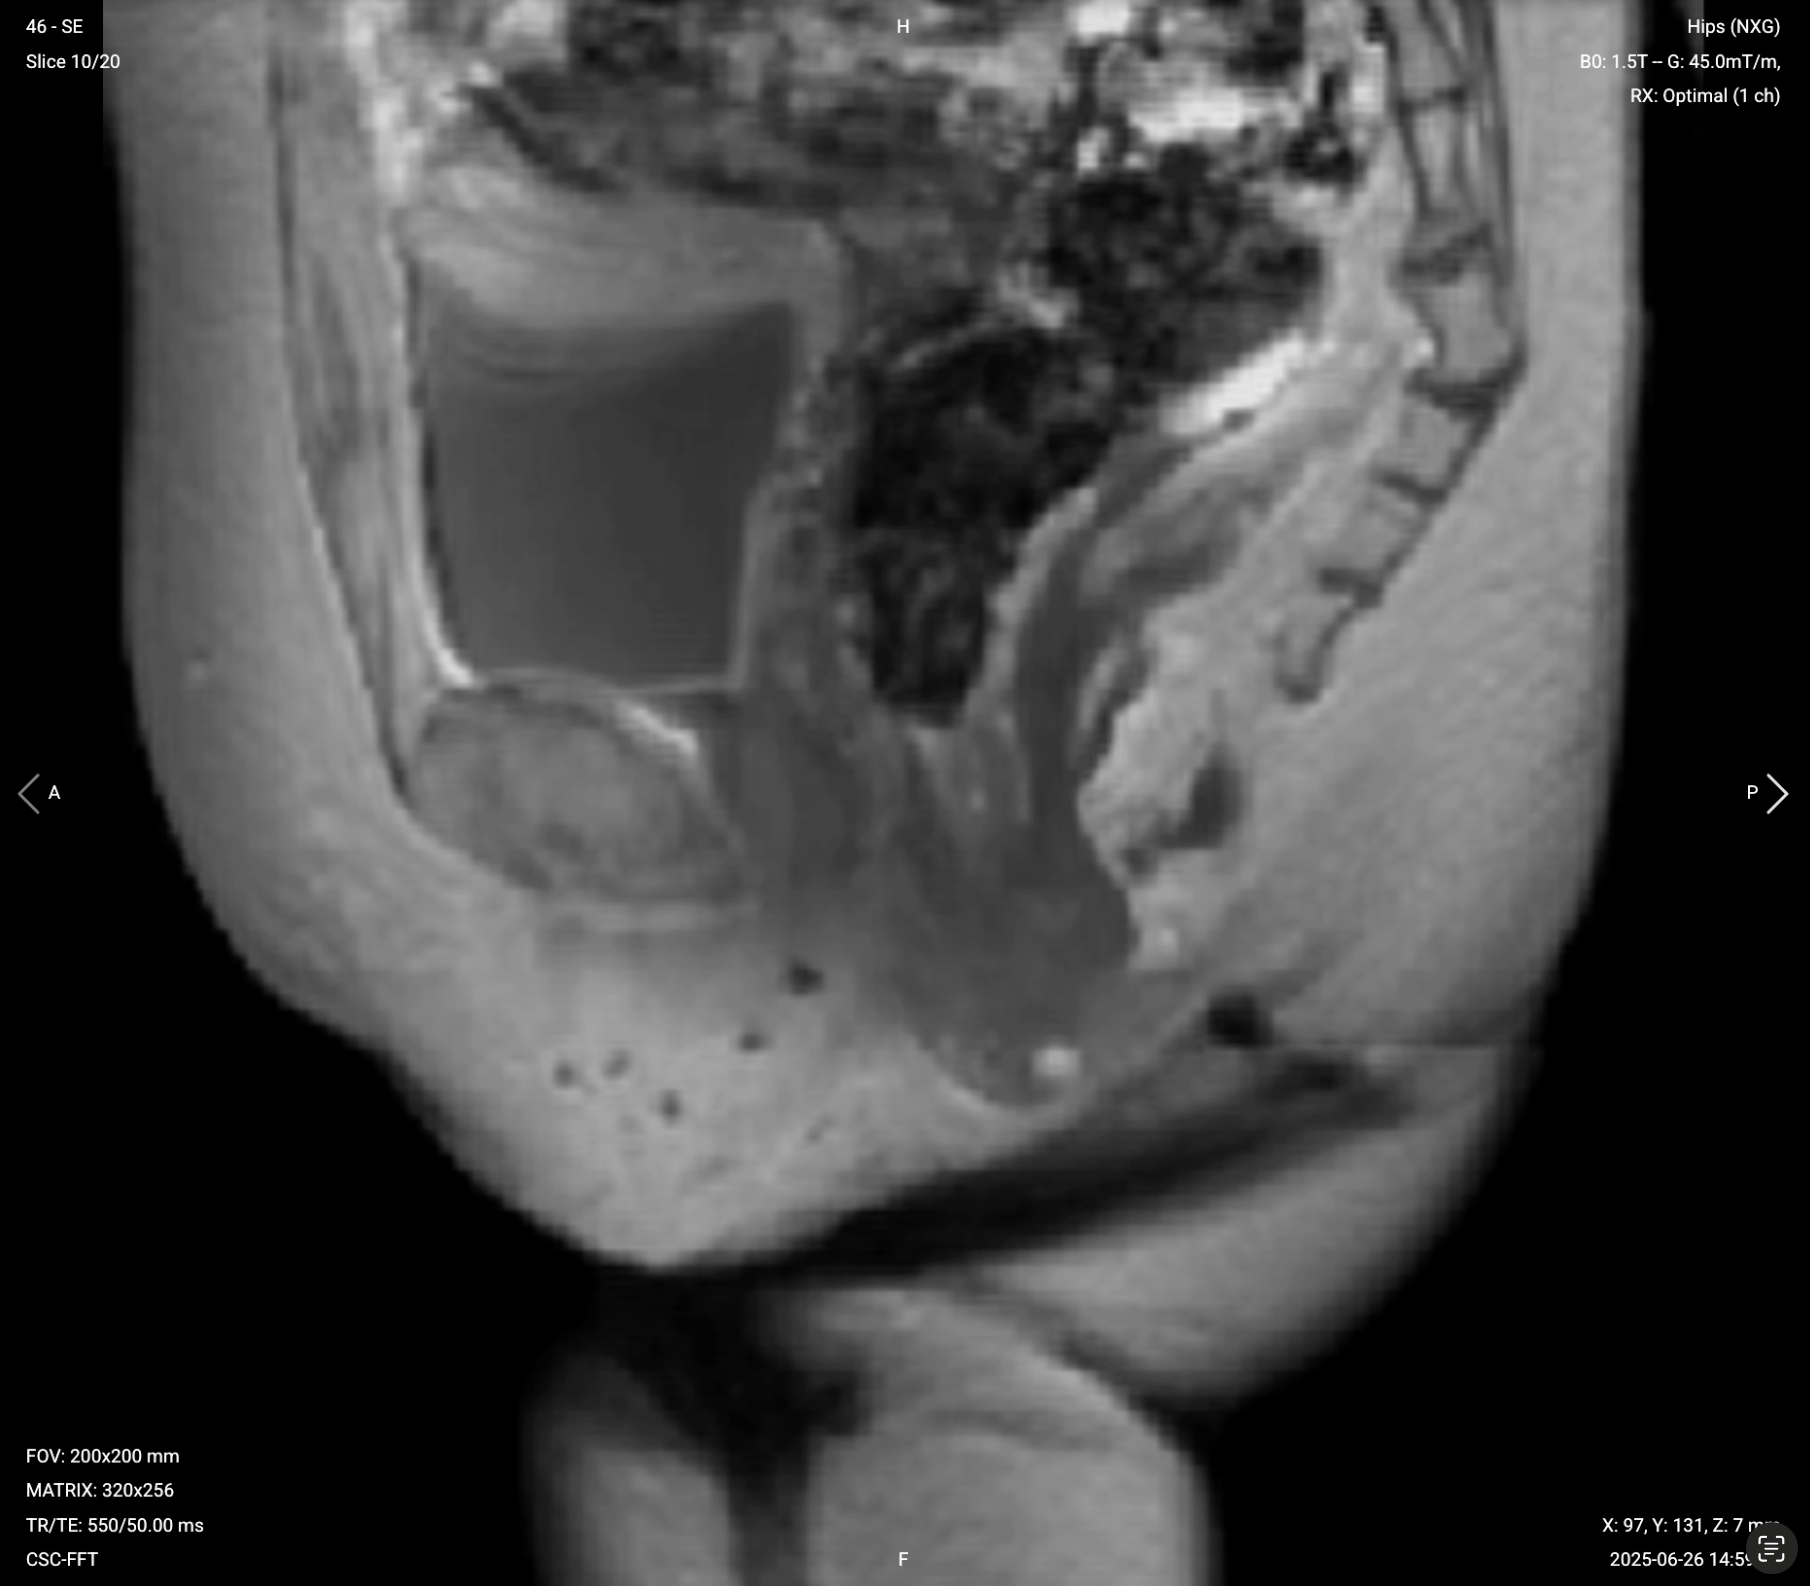
❌ Sagittal T2 SPAIR – Example of Poor Fat Suppression:
Signs of Failed Fat Suppression:
Heterogeneous fat signal (some areas bright, others dark)
Relationship between fistula and sphincter complex
Vertical extent of inflammatory changes
We then acquire axial views perpendicular to the anal canal for the most diagnostic images, as they show tracts crossing from internal to external sphincter clearly.
T1 TSE Pre-contrast – Structural Detail and Chronic Changes
T1-weighted imaging makes fat appear bright and fluid dark. This contrast is ideal for fat-rich tissues and structural abnormalities. T1 shows anatomical structures clearly, since it helps us see where different solid tissues like muscle and fat meet.
In anal fistula MRI, pre-contrast T1 sequences provide baseline anatomy and help identify chronic fibrotic changes. They show the normal fat planes between muscles and help detect fat infiltration or obliteration that indicates chronic inflammation.
We acquire pre-contrast T1 in the sagittal plane to match our T2 sequences for direct comparison.
Fat planes between muscles preserved or obliterated
Chronic fibrotic changes (intermediate signal)
Baseline anatomy before contrast enhancement
T1 TSE Post-contrast – Identifying Active Disease Through Enhancement
Post-contrast T1 shows where gadolinium accumulates in tissues with active blood supply and leaky vessels. Enhancement indicates active, vascularized tissue.
In anal fistula MRI, post-contrast T1 differentiates healing tissue from mature scar. Active granulation tissue in fistula walls enhances brightly, while chronic fibrotic tracts show little to no enhancement. Abscesses show characteristic rim enhancement around a dark center of pus.
Enhancement supports a reading of active inflammation or granulation tissue, while a tract with low T2 signal and little enhancement is more likely fibrotic. This is one input to surgical planning alongside the tract anatomy, sphincter involvement, and the clinical picture, and how much weight it carries varies between teams.
We typically acquire post-contrast T1 in the same sagittal plane as pre-contrast for direct comparison. Some protocols may add axial or coronal post-contrast sequences for complex cases.

.svg)





%20Fat%20Saturation%2C%20Failed.png)